.png?width=200&height=105&name=Newsletter%20Images%20(27).png)
Create QR codes in Tenant Connect® to direct tenants and other authorized users to the appropriate Tenant Connect experience.
A Subdomain Home Screen QR code provides a general entry point where users can select a facility and navigate to gate access. You can also create optional QR codes that route users directly to a facility or specific G.O.A.T. access point.
Before Creating a QR Code
Complete the following Tenant Connect setup:
- Connect your Facility Management Software.
Follow Integrate with Tenant Connect to connect and test your FMS integration.
- Create a Tenant Connect subdomain.
Follow Create Your Brand (Subdomain) to create the branded Tenant Connect website the QR code will use.
- Confirm that the facilities are listed in Tenant Connect.
Open Facilities and verify that the necessary facilities were imported successfully.
- Assign the facilities to the correct subdomain.
Follow Assign Facilities to Subdomains. A facility must be assigned to a subdomain before it can be used in the tenant-facing experience.
For the complete setup sequence, see Getting Started in What Is Tenant Connect®?.
Create the QR Code
- Sign in to the Tenant Connect Operator Portal.
- Select QR Codes.
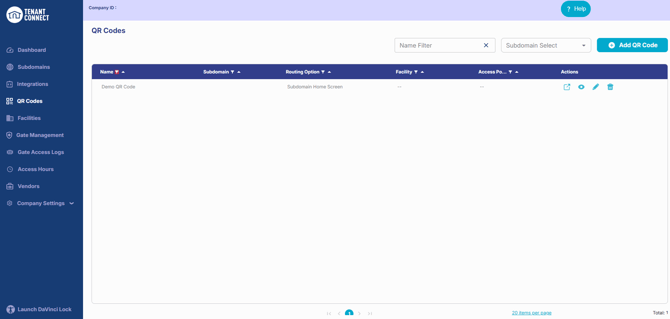
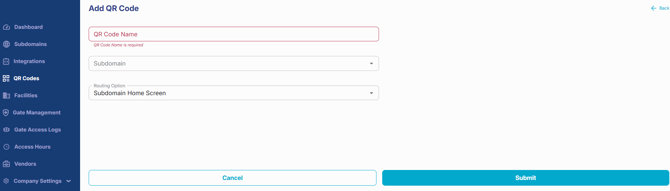
5. Select the appropriate Subdomain.
6. Select a Routing Option:
-
- Subdomain Home Screen: Opens the main tenant-facing Tenant Connect portal. Users can select a facility and navigate to the available services and gate-access options. A specific facility or access point is not required.
- Redirect to Facility: Opens the Tenant Connect home screen for a specific facility. Select the facility users should be directed to.
- Redirect to Access Point: Opens the access flow for a specific G.O.A.T.-controlled entry point. Select the facility and access point.
-
-
If Select Access Point is empty or the expected gate does not appear, confirm that the correct facility is selected. The G.O.A.T. may not be assigned to that facility. Contact DaVinci Lock Support so the assignment can be reviewed and corrected.
-
Note: To change a QR code’s routing option, edit the existing QR code. You do not need to create a new QR code or delete the current one.
Download and Post the QR Code
After creating the QR code:
- Open it from the QR Codes list.
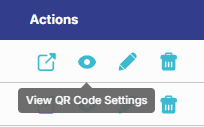
3. Download the QR code so that it may be uploaded when purchasing signage.
4. Print the signage without stretching, blurring, or otherwise altering the QR code.
5. Complete the testing instructions below.
6. After successful testing, post the sign where users can scan it safely.
For a Redirect to Access Point QR code, post the printed sign at the exact gate, door, or entry point selected in the QR-code settings.
Test the QR Code
Always test a QR code before posting it for customer use.
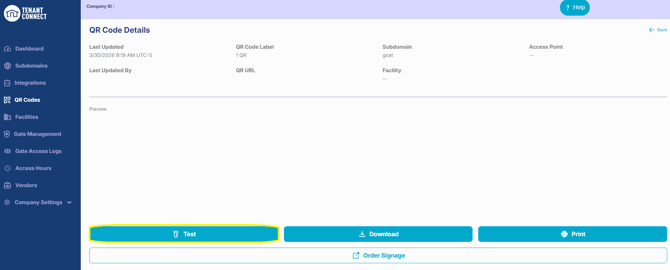
- Subdomain Home Screen: Confirm that Tenant Connect opens and that the user can select the correct facility and navigate to gate access.
- Redirect to Facility: Confirm that the correct facility opens.
- Redirect to Access Point: Confirm that the intended access flow opens. Complete a controlled test and verify that the correct gate or door opens.
Only order and post the signage after confirming that the QR code routes users to the correct destination.